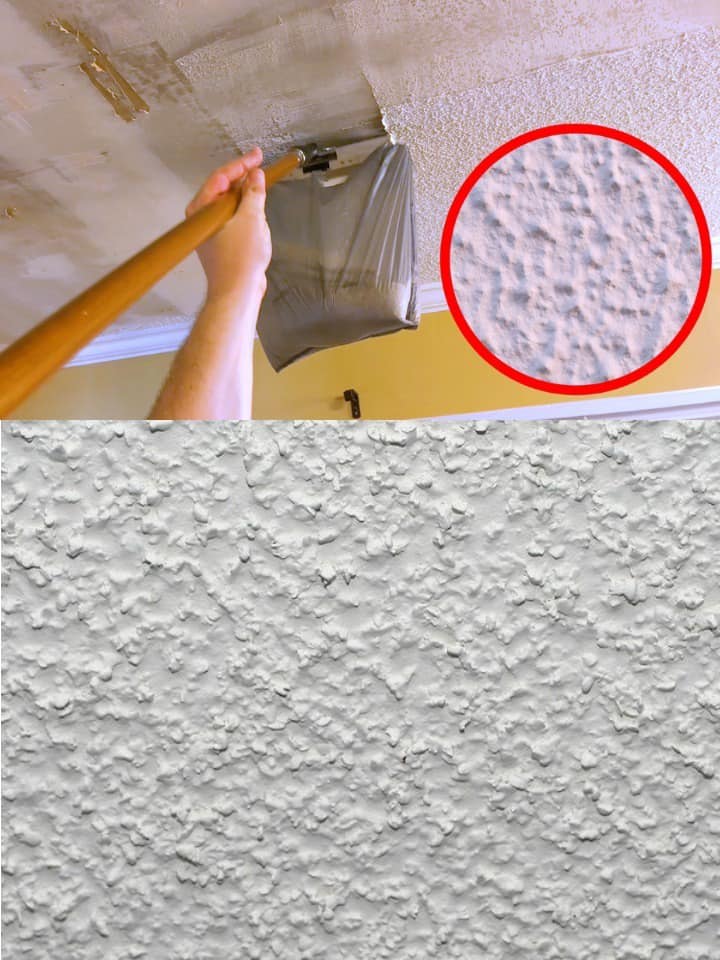
Within the mid-Twentieth century, popcorn ceilings had been in style, particularly in bedrooms. This coarse, corrugated cloth was used extensively in new properties from the Fifties by way of the Nineteen Eighties for its distinctive sound-insulating skills and knack for masking ceiling imperfections.
Nevertheless, these textured ceilings could make a room darkish due to their lack of sunshine reflection and are sometimes thought of aesthetically unsatisfactory by many owners.
Luckily, eradicating texture from popcorn is not as daunting because it sounds, although a bit messy and tedious. Nevertheless, the improved look and brighter temper of your room after renovation is price it.
+Step 1: Preparation & Precaution
Luckily, eradicating texture from popcorn is not as daunting because it sounds, although a bit messy and tedious. Nevertheless, the improved look and brighter temper of your room after renovation is price it.
+Step 1: Preparation & Precaution
Earlier than diving into the challenge, make certain to have your popcorn ceiling examined by an EPA-accredited lab. If your house was constructed earlier than 1982, the roof cloth could comprise asbestos. If asbestos is detected, it’s most secure to rent a licensed skilled who focuses on dealing with hazardous supplies. If the material is asbestos-free, be at liberty to take away it your self. Nevertheless, keep in mind to flip off the electrical energy within the room earlier than you start, as it is a water-based process.
+Step 2: Defend and put together the room
Perceive that eradicating a popcorn ceiling is a posh enterprise. Nevertheless, correct preparation can considerably cut back post-project cleanup. Begin by eradicating all of the furnishings and protecting the room’s flooring and the underside of the partitions (about 16 inches) with heavy-duty plastic wrap, securing it with duct tape.
Do not forget to defend the higher partitions, too. Glue across the perimeter of the room, just under the ceiling, and safe with further tape. It’s possible you’ll want to take away any ceiling fixtures resembling followers, moldings, or pendant lights to guarantee a smoother operation.
+Step 3: Spray, wait, scrub
Divide the ceiling into manageable 4-square-foot sections. Utilizing a backyard sprayer, rigorously drench the primary part and let it soak for 10-Quarter-hour. Placed on security gear – a mud masks and goggles – after which climb a ladder to get to the moist space. Maintain the putty knife at a 30-degree angle from the ceiling, and start scraping the feel of the popcorn away. Proceed this cycle of spraying, ready, and scraping, working one part at a time till you’ve gotten lined the whole room.
+Step 4: Prime, Paint and End
Proceed till you’ve gotten scraped the feel of the popcorn everywhere in the ceiling, revealing the underside floor of the drywall. As soon as that is achieved, you might have considered trying to paint the ceiling and provides it a brand new look. Since you’ve got already protected the room with plastic sheeting, this must be a breeze. Keep in mind to take away the chips solely after the ultimate topcoat has utterly dried. Additionally reinstall any gadgets you eliminated and restore energy to the room.
Step again now and benefit from the transformation! A room will immediately really feel brighter and extra fashionable with no popcorn ceiling. Get pleasure from your new area !